 |
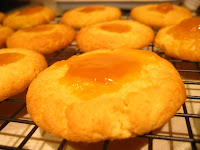
| The final product! |
Ingredients
125 grams of butter
2/3 cup caster sugar
1 tsp vanilla extract
- 1 egg yolk
- 1 1/4 cups self-raising flour
- 2/3 cup desiccated coconut
- 1/2 cup kaya (I used the one without the pandan)
- Method
- 1. Preheat the oven to around 180 degrees celsius (fan forced oven), and line two baking trays with baking paper;
- 2. Cream the butter, sugar and vanilla extract using a hand mixer. The mixture should go pale and creamy. A good way to tell if its ready is to rub a little of the mixture between two fingers, you should not be really be able to feel the sugar grains anymore;
- 3. Add the egg yolk and mix it in well. The add the flour and the coconut. You can either mix it with the hand mixer or fold it in with a wooden spoon until just mixed in;
- 4. Use a teaspoon and take bits of the dough and roll them into balls (if you have wet hands this will work easier) and place the balls on the baking tray. They will spread a bit so give them room;
- 5. Flatten each ball a little and make a nice indent in the centre (the back of a teaspoon will do);
- 6. Use two teaspoons to place some kaya in the middle of each biscuit. If the kaya has been in the fridge this will be a bit easier as it won't run as much;
- 7. Bake for about 15 minutes or until golden. Keep an eye on them as depending on your oven they make cook faster. Once cooked, let them sit for a bit on the trays so that they can harden up, if you try and move them beforehand it will not work at all! Then put them on a wire rack to cool.
- I kept the biscuits in the fridge overnight because of the kaya but as it turns out you don't really need to. However because the kaya does have egg it in I would not be leaving them in the kitchen for too long. But they are so delicious that I doubt you will have such a problem!

 |
| Kinda looks like a mini egg yolk doesn't it? |
 |
| Cooling nicely |

0 comments:
Post a Comment